
Have you seen the cute new knotted bow headbands in all the stores? My girls are obsessed with them and turns out they are super simple and quick to make! I made several this week for them and put together this easy tutorial so you can make them too.
You will need the following supplies:
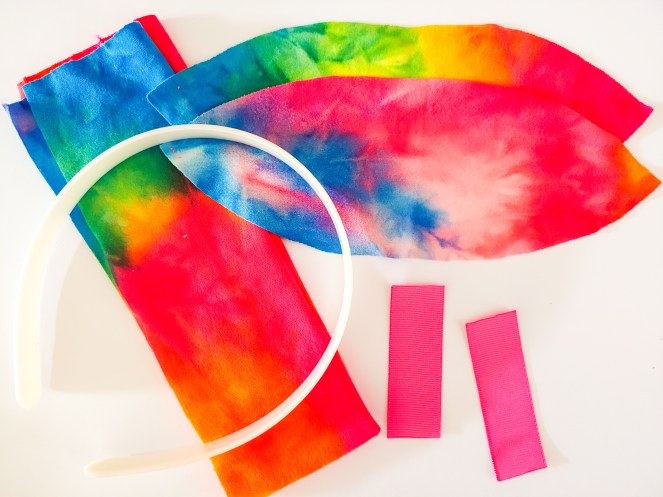
-Basic sewing machine & sewing supplies (needle, thread, straight edge etc)
-Fabric, stretch fabric is recommended but not necessary, cut to 5″ wide and 15″ long
-Ribbon in 7/8″ width and coordinating color: 2 pieces cut to 2 inches each with ends heat sealed with a lighter to prevent fraying
-Blank plastic headband (I grabbed 1″ size here)
-Hot glue/glue gun
-PDF pattern piece below with 2 pieces of fabric cut on the fold for the knotted bow:
Headband Tutorial Pattern Piece
First, you will sew the 5″ x 15″ strip of fabric right sides together down the long side as shown clipped below. After it is sewn you will turn it right side out and set it aside.

Next, you will sew your knotted bow. You will pin or clip these right sides together and sew all the way around leaving a 2-3 inch gap (shown circled below) open. Turn this right side out through the open hole and and be sure to poke out the corners well. Then, sew the gap closed with a straight stitch and set this aside. **Please note I am not a pattern designer, this is a hand drawn pattern piece that I traced in my Silhouette software and converted to a PDF so it is not fancy but it does the job**

Next, you will assemble your headband. Slide the headband into the strip of fabric we have sewn. Be sure your seam is centered on the inside of the band. You will dab a small amount of hot glue to both ends on both inside and outside to hold the fabric in place. After that fold each side over to the outside (very important as if you fold to the inside it will hurt behind your ears) and dab glue to hold this in place. You will be sandwiching it together creating a fold/pleat on the outside as shown in the middle picture below. Finally, you will glue the pieces of grosgrain ribbon on the ends.


Your headband will look like this after gluing the fabric and ribbon on to the ends. It has a slouchy look which can be completely customized. You can adjust your fabric size to your preference to be slouchier, a more snug fit, etc.

Lastly, tie your knotted bow piece onto the headband and you are finished! This piece is also completely customizable. You can make the end pointier or more rounded or you can lengthen the piece in the middle for a longer knot (lengthening is recommended if using a non stretch fabric for your knot).

Now, go make all the headbands and have fun with it!

