Craft Tutorials

Oversized Hoop Wreath

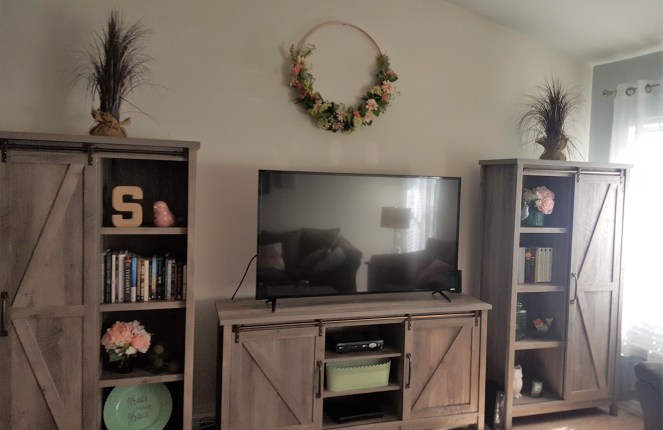
This past summer we upgraded to new furniture in our living room and some fresh new decorations were needed to match!  We went with grey as our main color with blush and mint accents.  I had so much fun creating the new look, it feels like an actual “grown up” room for the first time!

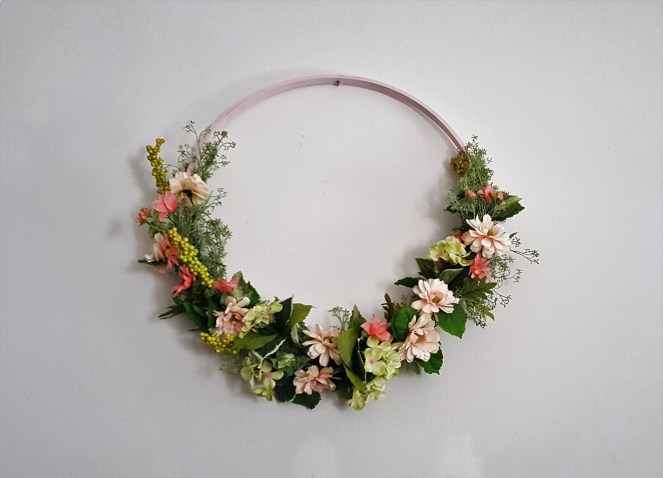
We have a large empty wall space above our entertainment center that needed an accent decoration.  I wanted something large but still simple and sweet.  I decided to put together an oversized hoop wreath and put together a quick tutorial for you as it is SO easy and really adds to any room!

The supplies you will need are:

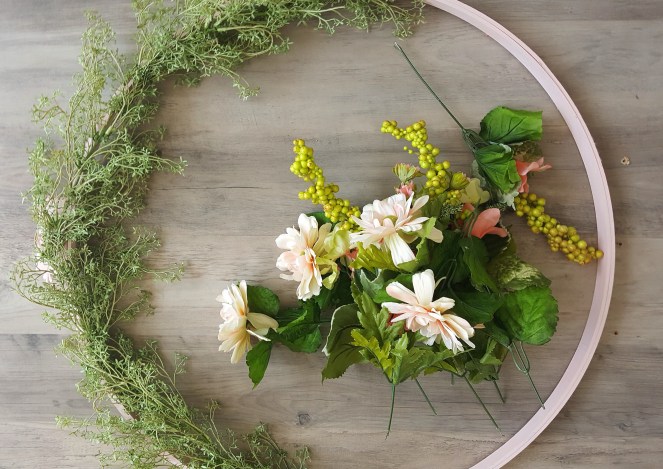
-Oversized hoop:  I used an 18″ Quilt Hoop that I picked up at Joann using a 40% off coupon

-Floral wire

-Artificial Greenery and Flowers:  I love the selection at Hobby Lobby (AND they go on sale 50% off every other week!)

-Glue Gun

20170816_112718

**I did decide to spray paint my hoop light pink right before starting it because the wood did not match our living room decor.**

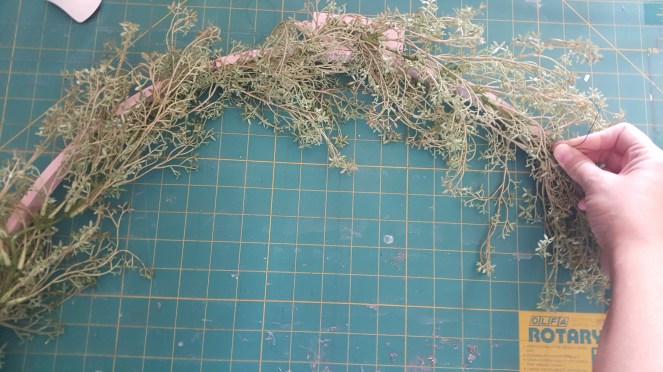
I started by pulling my flowers off of the stems and laying them out loosely on the hoop to get an idea of what it would look like.  After that, just add the greenery on first.  I wanted mine to cover only half the hoop. Use pieces of your floral wire to secure the greenery to the hoop.

20170828_104237 (2)

Once your greenery is secured use more floral wire to secure your flowers on.  You can use hot glue as well in any areas that need extra hold.

20170828_111036 (2)

Once finished you can hang just on the actual hoop or you can add rope, twine, etc to hang it from.  It looks perfect centered over our entertainment center and is exactly the oversized but simple statement piece we were aiming for!  And, even better, you can easily swap it out seasonally!

20180210_123904
Completed oversized hoop wreath!


20180210_123846


Craft Tutorials

Personalized Welcome Mat

Our first post will be a super easy tutorial for a personalized welcome mat!  We used a Silhouette machine to make our stencil but you can purchase pre-made stencils as well if you don’t have a vinyl cutter.

You will need the following supplies for this project:

*Blank Door Mat (We used this mat from Ikea but they are also at Target)

*Acrylic Craft Paint in Your Choice of Colors

*Foam Paint Brushes

*Vinyl (and Transfer Tape) or Pre-Made Craft Stencil (I used Design ID #30207 in the Silhouette Store)

Supplies
My Supplies:  Transfer Tape, Vinyl Stencil, Acrylic Paint, Foam Brush, Blank Door Mat

I wanted something simple and bright to welcome our guests so I made a stencil with the word hello in a summery aqua shade.  First, you will adhere your stencil to the mat.  It is a little tricky to get the vinyl fully adhered to the mat so I did use a blowdryer to lightly melt the vinyl on the edges.

Applied Stencil
My Applied Stencil, I Used a Blowdryer to Really Adhere It!

Next, you will just paint your design.  I recommend a foam brush and to “dab” the paint on.  If you brush it on you will most likely get paint leaking under the stencil.  You will dab on several coats (3-4) until the stencil is fully colored without the mat color showing through.  Once dry, carefully peel up your stencil and you are finished.  This is so simple and a great way to personalize your front entry!

In Progress
Be Sure To Dab Your Paint On and Not “Brush” It On!
Finished Mat
My Finished Mat!